Book Appointment Now

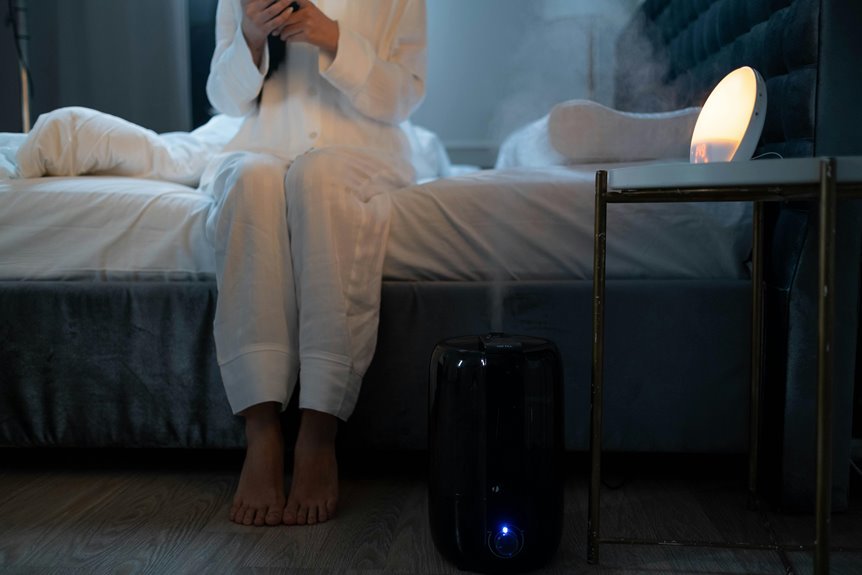
Why Is My Humidifier Leaking Water?
A leaking humidifier usually points to a fixable issue rather than a ruined unit. Check the tank seal and confirm the tank sits firmly on the base, since a small shift can let water escape. Inspect the tank and base for cracks that allow leaks. Avoid overfilling and look for worn or damaged parts like gaskets and valves. Simple clues such as drips around the base or puddles beneath the unit often reveal the specific cause and guide the next repair step.
Why Is My Humidifier Leaking Water?
A leaking humidifier can feel frustrating, but the cause is usually something you can spot provided you look closely. You’re not alone whenever a puddle shows up, and most fixes start with simple checks.
Initially, inspect the unit for cracks, loose parts, or a tank that sits crooked on the base. Then look for mineral buildup that can block water paths and send it where it shouldn’t go.
Should your model uses a pump or valve, a stuck part can keep water moving too long. Also, poor placement on a wobbly surface can create overflow, while excess moisture could hurt air quality.
In rare cases, electrical faults can join the mess, so unplug the unit before you investigate.
Check the Water Tank Seal
Start through checking the water tank seal, because this tiny part often causes the whole mess.
Lift the tank and look closely at the cap, rim, and gasket for cracks, flat spots, or brittleness.
Good seal materials should feel flexible, not dry or crumbly.
Should the ring look worn, swap it before the leak grows.
Also, check for mineral grit or a tiny tear that keeps the seal from sitting tight.
Once you see damage, clean the area gently and dry it fully first.
Then replace weak gasket adhesives with the right product provided your model uses them.
You’re not alone in this fix.
A snug, healthy seal helps your humidifier hold water where it belongs and keeps your room calm.
Make Sure the Tank Sits Properly
Assuming the seal looks fine, the next thing to check is how the tank sits on the base, because a perfect gasket still can’t do its job provided the tank is crooked or off-center.
Lift the tank, then set it back down slowly and feel for a clean drop into place. You want even contact all around, not a wobble or half-fit. Use alignment tips like matching the guide tabs, lining up the neck, and watching for a snug seat.
Base centering matters too, because a shifted tank can tilt and drip. In case the unit feels loose, try again with both hands and a steady press. You’re not doing anything wrong; these little fits can be fussy.
Once it settles evenly, the leak might stop.
Inspect the Base for Cracks
Take a close look at the base for hairline cracks, because even tiny splits can let water escape.
Check the seams and joints too, since those spots often weaken initially and start dripping.
Then place the base on a dry surface and trial it for leaks so you can spot the problem before it gets worse.
Check For Hairline Cracks
A tiny crack in the humidifier base can act like a concealed escape route for water, so a careful check here can save you a lot of frustration.
You can spot these flaws with a microscopic inspection under bright light, and UV illumination can make faint lines stand out.
Slowly turn the base in your hands and look for thin marks, rough spots, or warped plastic around the bottom.
Should you see one, don’t brush it off as harmless; even a tiny split can widen when the unit warms up.
Keep the surface clean and dry so the crack shows more clearly.
In the event the damage runs through the plastic, replace the base soon.
That small step helps you stay in control and keeps your humidifier working alongside you, not against you.
Examine Seams And Joints
Even though the base looks fine at initial glance, the seams and joints can still hide the real problem. You’re not alone in case a tiny drip makes you worry; seam inspection helps you spot weak spots before they spread. Look closely where the plastic meets, especially corners, edges, and molded lines. | Area | What to notice |
| — | — |
|---|---|
| Base seam | Thin splits, lifted edges |
| Joint line | Wet shine, loose fit |
| Corner join | Stress marks, tiny gaps |
| Connection point | Dry cracks, warped plastic |
Use bright light and turn the unit slowly. Should a joint feel stiff, gentle joint lubrication could help it seat better during cleaning. Wipe away residue, then check for any odd flex. Once you catch issues ahead of time, you keep your humidifier’s place in your home feeling steady and cared for.
Test Base For Leaks
Now that you’ve checked the seams, the base needs its own careful trial, because a tiny crack there can turn into a steady drip before you know it.
Dry the unit initially, then set it on a paper towel so you can spot fresh moisture fast.
Next, fill the tank and watch the base for a few minutes.
In case you want a stronger leak simulation, move the humidifier gently from side to side and see whether water gathers underneath.
Under bright light, inspect the plastic for hairline splits, warping, or worn spots around the corners.
In the event the base still looks fine, do simple electrical testing only provided your model has powered parts near the reservoir.
A cracked base usually means replacement, and that’s okay.
You’re not failing; you’re just finding the real source.
Don’t Overfill the Humidifier
Keep the water level at or below the fill line, because extra water can spill out whenever you move the tank or whenever the humidifier starts running.
In case you pour in too much, you can end up with overflow that looks like a leak and leaves a wet mess around the unit.
A proper fill level helps your humidifier work smoothly and keeps water where it belongs.
Fill Line Limits
A humidifier can look like it’s doing a simple job, but the fill line matters more than many people realize. Whenever you ignore fill limits, you push water above the reservoir markers, and that extra depth can slosh toward openings while you move or run the unit.
You don’t need to guess here. Just stop at the line, then check that the tank sits level on its base. Should you’ve ever rushed a refill, you’re not alone, but a careful pour keeps your space dry and your routine calmer.
Also, wipe the rim before you close it, because a clean seal helps the tank sit right. Small habits like these protect your humidifier and save you from that annoying puddle surprise.
Extra Water Overflow
Extra water could seem harmless at initially, but it’s one of the fastest ways to create a mess under your humidifier. Whenever you pour past the safe level, the tank can slosh, tip, or push water through vents and seams. That’s why overflow prevention matters every time you refill.
Pause for a moment, read the markings, and leave a little space so the unit can handle movement. Should your model offers filling automation, use it to reduce guesswork and keep the process steady. You’ll save yourself a damp floor and a frustrating cleanup.
Small habits like these help you fit in with the folks who keep their homes running smoothly. A careful refill keeps your humidifier working with you, not against you.
Proper Tank Levels
Most of the time, a humidifier leak starts with one simple mistake: the tank is too full. You want the water to sit at the ideal fill mark, not above it. Whenever you overfill, water can slosh out during carry, placement, or startup, and that little spill can feel like a bigger problem than it is.
Check your model’s line, then stop there. Provided your unit has sensor calibration, make sure it reads the water level correctly, because a bad reading can make you suppose you’ve done everything right.
After filling, wipe the tank, set it on the base, and watch for drips. Should the leak stop, you’ve likely found your fix. You’re not alone in this; many people miss that line and end up mopping.
Remove Mineral Buildup
Mineral buildup often hides at the root of a leaking humidifier, and it can make a small problem turn into a messy one fast. You can lift the tank, inspect the tray, and wipe away white crust with a soft cloth and vinegar mix. Should you notice heavy residue, do mineral screening so you know how hard your water is and what you’re fighting. Then clean nozzles, drain paths, and pads so water can move the right way again.
Regular cleaning also supports scale prevention, which helps you stay ahead of drips and backup. Whenever you keep those passages clear, your unit can work with you instead of against you, and that makes your space feel calmer and more comfortable.
Replace Worn Gaskets and Valves
A worn gasket or valve can turn a steady humidifier into a sneaky drip machine, so it’s worth checking these parts whenever water keeps showing up where it shouldn’t.
You can start by opening the tank area and looking for flattened, brittle, or cracked seals. Provided the gasket feels stiff or leaves wet spots, replace it right away, since gasket lifespan drops after heavy use.
Next, inspect the valve for mineral grit, loose fit, or damage that keeps it from closing fully. Proper valve maintenance means cleaning the part gently and swapping it whenever wear shows.
Once you install new pieces, seat them snugly and follow the manual. That simple fix helps you keep your humidifier working with the rest of your home.
Check for Leveling Problems
A wobbly humidifier can leak even though the tank and seals look fine. Check that the surface feels stable, then adjust the tank so it sits flat and snug on the base.
Provided the base isn’t level, set it on a steady spot so water stays where it should.
Check Surface Stability
Set your humidifier on a flat, steady surface, because even a small tilt can cause water to pool, shift, and leak out where it shouldn’t.
Check the floor stability initially, especially provided you’ve placed it on carpet, a rug, or a wobbly stand. Once the base rocks, the water inside can move unevenly and find a weak spot.
In case the room has slight bumps, use anti vibration pads to help steady the unit and reduce movement. Also, press down gently on each corner to see whether it sits firm.
You want the humidifier to feel settled, not like it’s ready for a tiny dance party. A stable surface helps the unit stay calm, so you can feel calm too, without surprise puddles forming nearby.
Adjust Tank Placement
Should the tank appear full but your humidifier still leaks, the problem could be that it isn’t sitting quite right on the base. Gently lift it off, then place it back so every edge lines up.
You want the tank to rest flat, not tilt on one side or wobble from floor vibration. Check the corner support points, since even a small shift can break the seal and let water drip.
Provided you hear a click, that’s a good sign the tank has settled in place. Wipe away any moisture, then try it again after a minute.
Once the fit feels snug, you help the unit work as a team with you, not against you. That little adjustment often solves the leak fast.
Level The Base
Should the tank now sit snugly and the leak still appears, the problem could be under it, not in it. Put the humidifier on a flat, solid spot and check for uneven feet. In the event one corner rocks, water can pool, then slip out like it’s trying to escape a tiny ship.
Press gently on each side and watch for wobble from floor vibration nearby. In case the unit shifts, slide a thin pad under the low side or move it to a steadier surface.
Also, make sure the base sits fully even after cleaning or refilling. A small tilt can break the seal and send water where it doesn’t belong. Once the base levels out, you often get a calmer, drier setup you can trust.
When High Humidity Causes Condensation
Whenever your humidifier starts making the room feel damp instead of comfortable, high humidity is often the reason, because extra moisture in the air can turn into condensation on the cooler parts of the unit.
You might notice room condensation on windows, walls, or the tank, and it can look like a leak even when nothing is broken.
Should the mist feel heavy, lower the output and give the room more airflow. Also, check humidity sensors in case your model has them, because a bad reading can keep the unit running too long.
You can place the humidifier farther from cold glass or vents, since chilly surfaces collect water fast. Small changes like these help you feel in control, and they keep your space cozy instead of muggy.
Repair or Replace Your Humidifier
Provided your humidifier still leaks after you’ve lowered the humidity and moved it away from cold surfaces, it’s time to look at the unit itself.
Check the tank for cracks, warped seams, or a loose cap, since these small flaws can send water straight out. If you spot worn gaskets, clogged drain paths, or a misaligned base, a repair could fix the problem fast.
Do a simple cost analysis initially. Should replacement parts cost almost as much as a new unit, buying a fresh humidifier often makes more sense.
You’ll save time, avoid repeat leaks, and keep your room comfortable. In the event you do replace it, choose eco disposal so the old unit leaves with less waste.
Frequently Asked Questions
How Often Should I Clean My Humidifier to Prevent Leaks?
You should clean your humidifier every few days, or at least weekly, to keep leaks away. Image clear water flowing smoothly through a fresh machine; weekly maintenance and timely filter replacement help you stay comfortable together.
Can Hard Water Cause My Humidifier to Leak?
Yes, hard water can make your humidifier leak because mineral buildup and scale formation clog passages, damage seals, and block drains. You will fit in easier with regular cleaning, descaling, and using distilled water.
Is a Leaking Humidifier Dangerous for My Floors or Walls?
Yes, it can damage your floors and walls, so do not ignore it. You will protect your home’s comfort and sense of belonging by drying spills quickly, preventing floor damage, and stopping mold growth before it starts.
Why Does My Humidifier Leak Only When It’s Running?
Your humidifier leaks only while it is running because water moves through damaged seals, a misaligned tank, filter issues, or a float malfunction. You are seeing active leakage under pressure, not simple storage seepage.
Should I Use Distilled Water to Reduce Humidifier Leaking?
Yes, use distilled water. Like rain easing over stone, it cuts mineral buildup, helps your humidifier’s filter lifespan, and can reduce leaks. You will also keep things cleaner, quieter, and more reliable for everyone at home.
